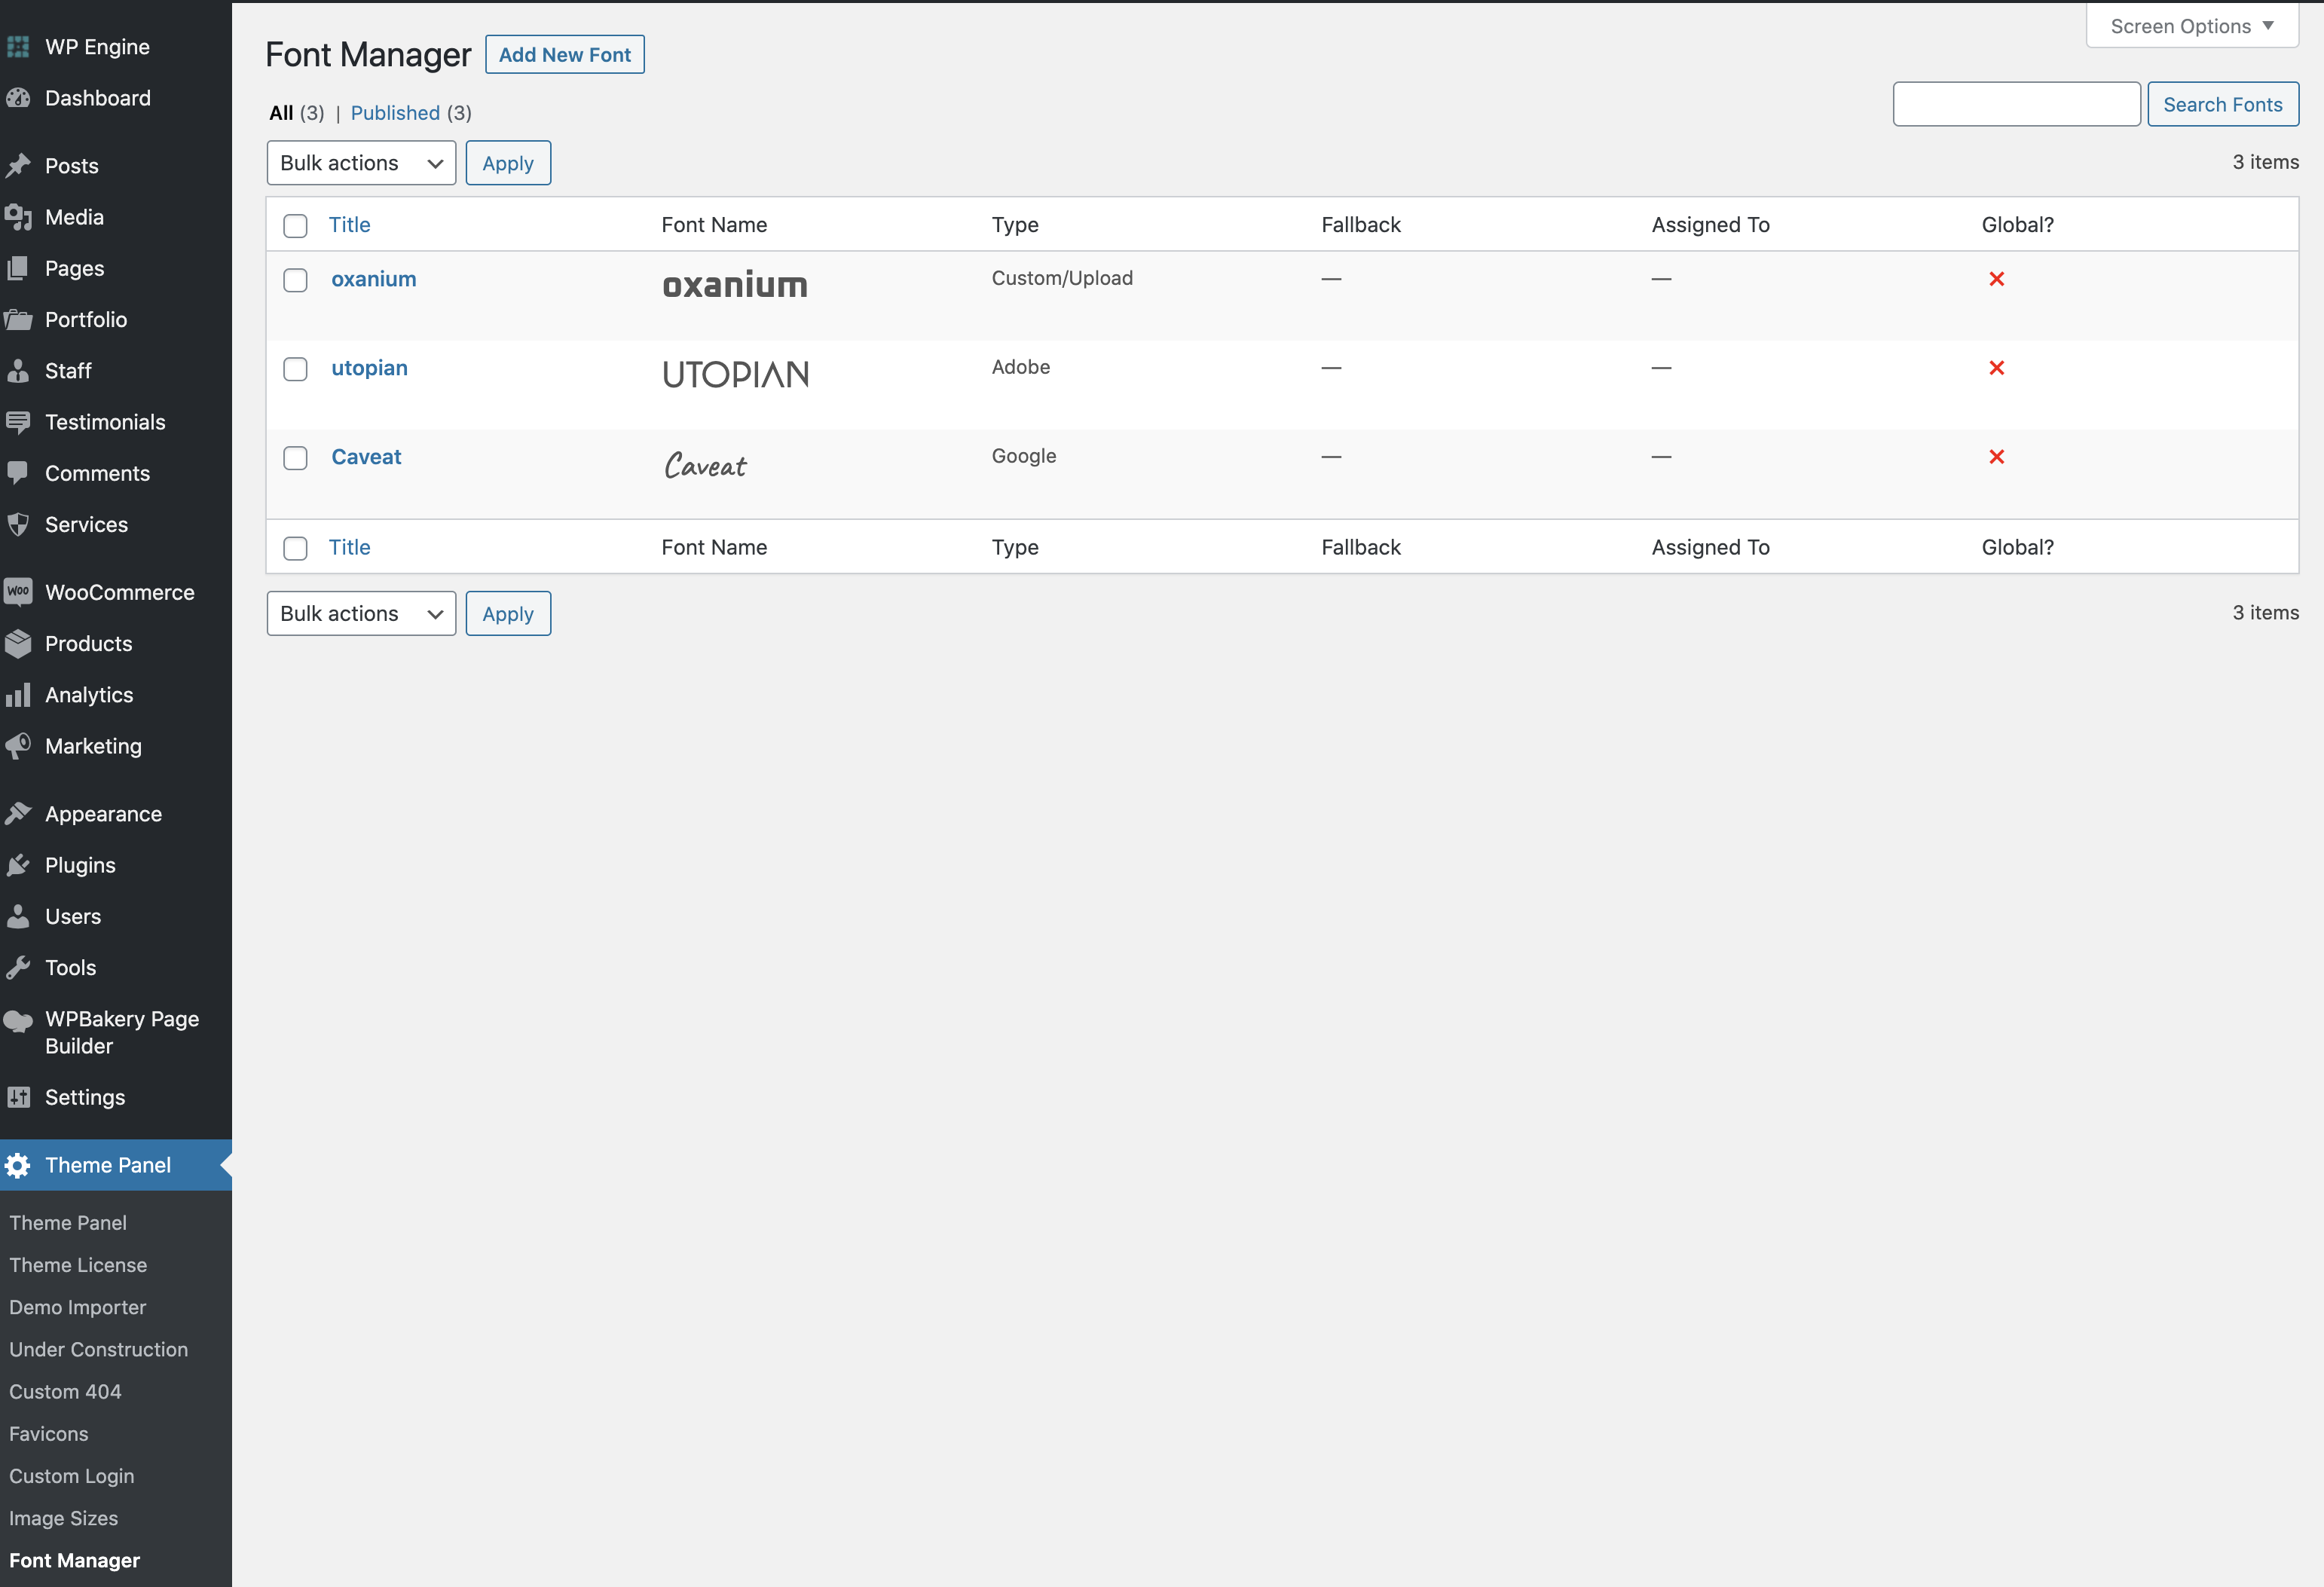
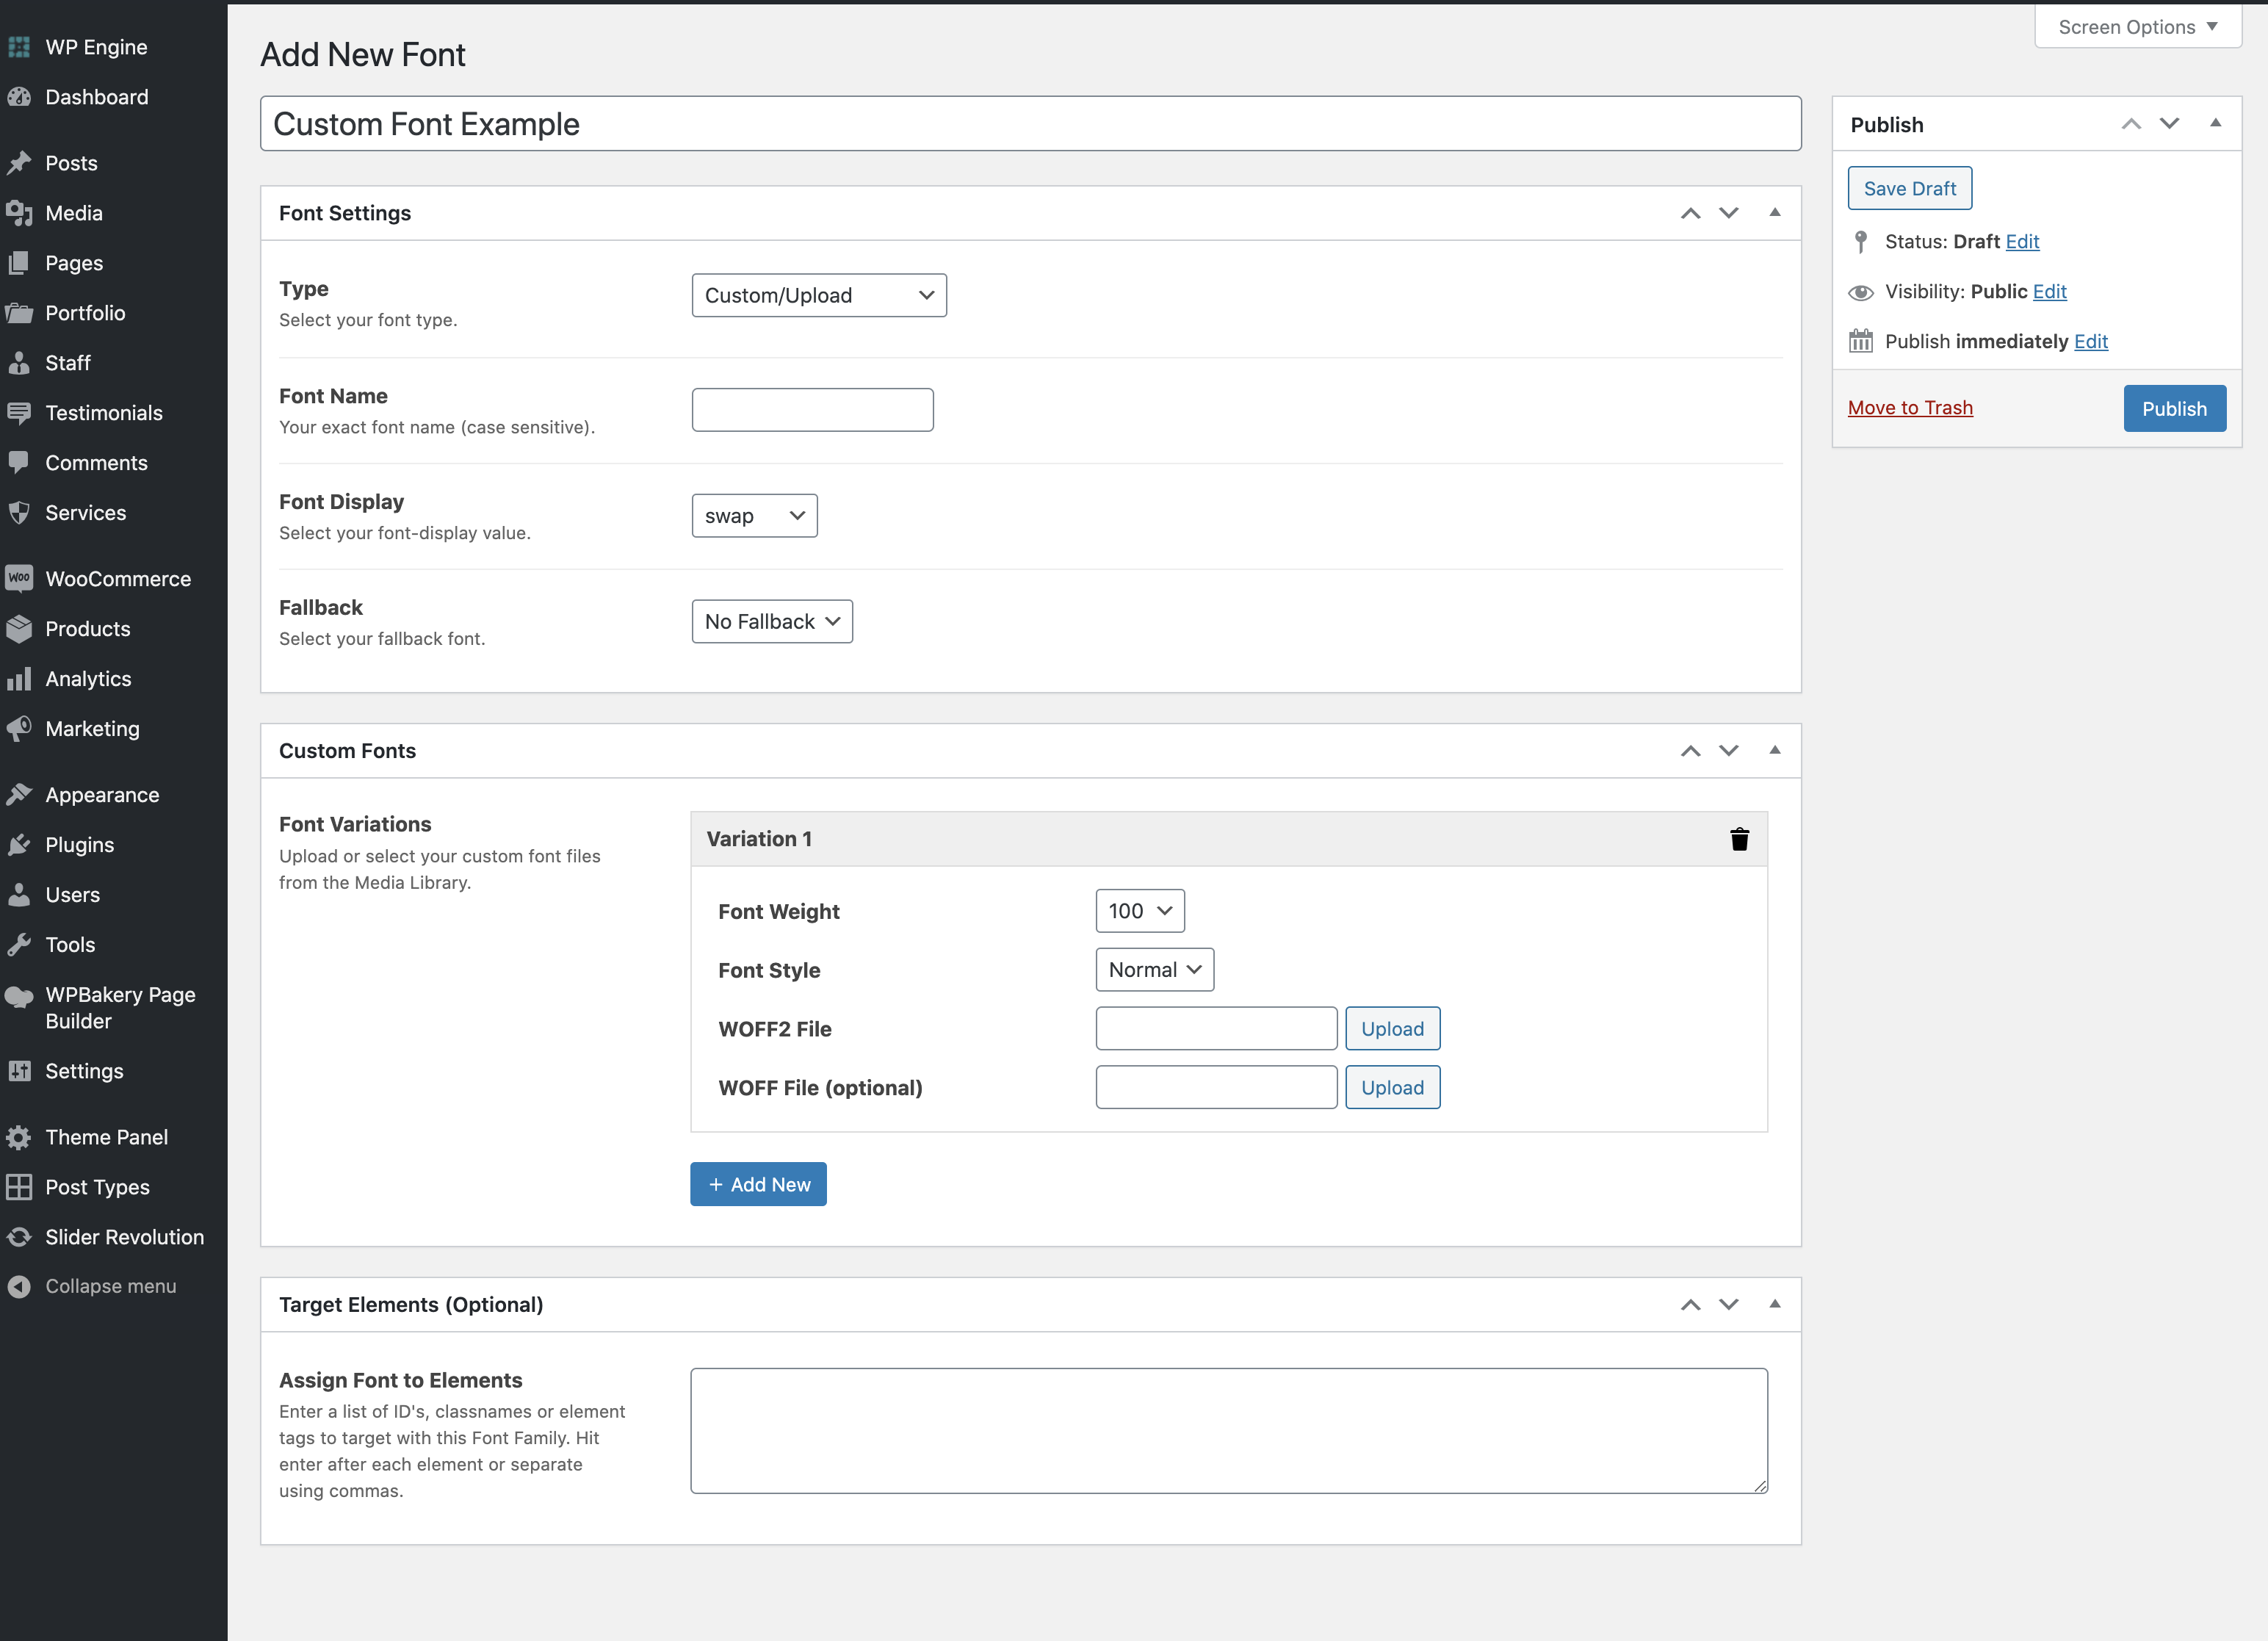
The Font Manager in the Total WordPress theme is a part of the Total Theme Core plugin which allows you to quickly and easily add or upload custom fonts to your site that you can use in the theme’s Customizer options and builder modules. You can select to define font families that you’ve already loaded via a child theme, load Adobe Fonts (previously known as Typekit), register Google fonts or upload your own custom font files.
The process is pretty straight forward:
- Go to Theme Panel > Font Manager
- Click on “Add New Font”
- Select a Type (Google, Adobe, Custom, ChildTheme/Other)
- Fill out the details depending on the type selected


Important: When you define your own fonts for use in the FontManager it will remove all the default Google fonts from the theme’s Customizer options and builder modules. This is an optimization to keep your site as fast and optimized as possible, only showing you the options you need. So if you define any fonts under the FontManage but want to continue using a Google font previously selected you can always add this font as well in the Font Manager to make it available for future use.
Self-Hosted Google Fonts
If you want to self host your Google fonts you can by simply adding a new font to the font manager and choosing the “Custom/Upload” option then uploading the font files.
Google doesn’t have any dedicated API for downloading web ready font files so we haven’t integrated automatic downloads for Google Fonts to the theme in order to prevent potential security/licensing concerns. That said, there is a very useful website you can use to download web ready Google fonts called “Google Webfonts Helper“.