Creating custom cards for your post entries has never been easier! The Total theme includes the ability to create custom cards right via the WP admin and best of all it works with your favorite builder! That’s right, you can make custom cards using WPBakery, Elementor or Gutenberg. Contrary to other card builders, we decided to use functionality already available that you are familiar with not only to keep things slim and fast but also make it easier to use.
Adding a New Card Design
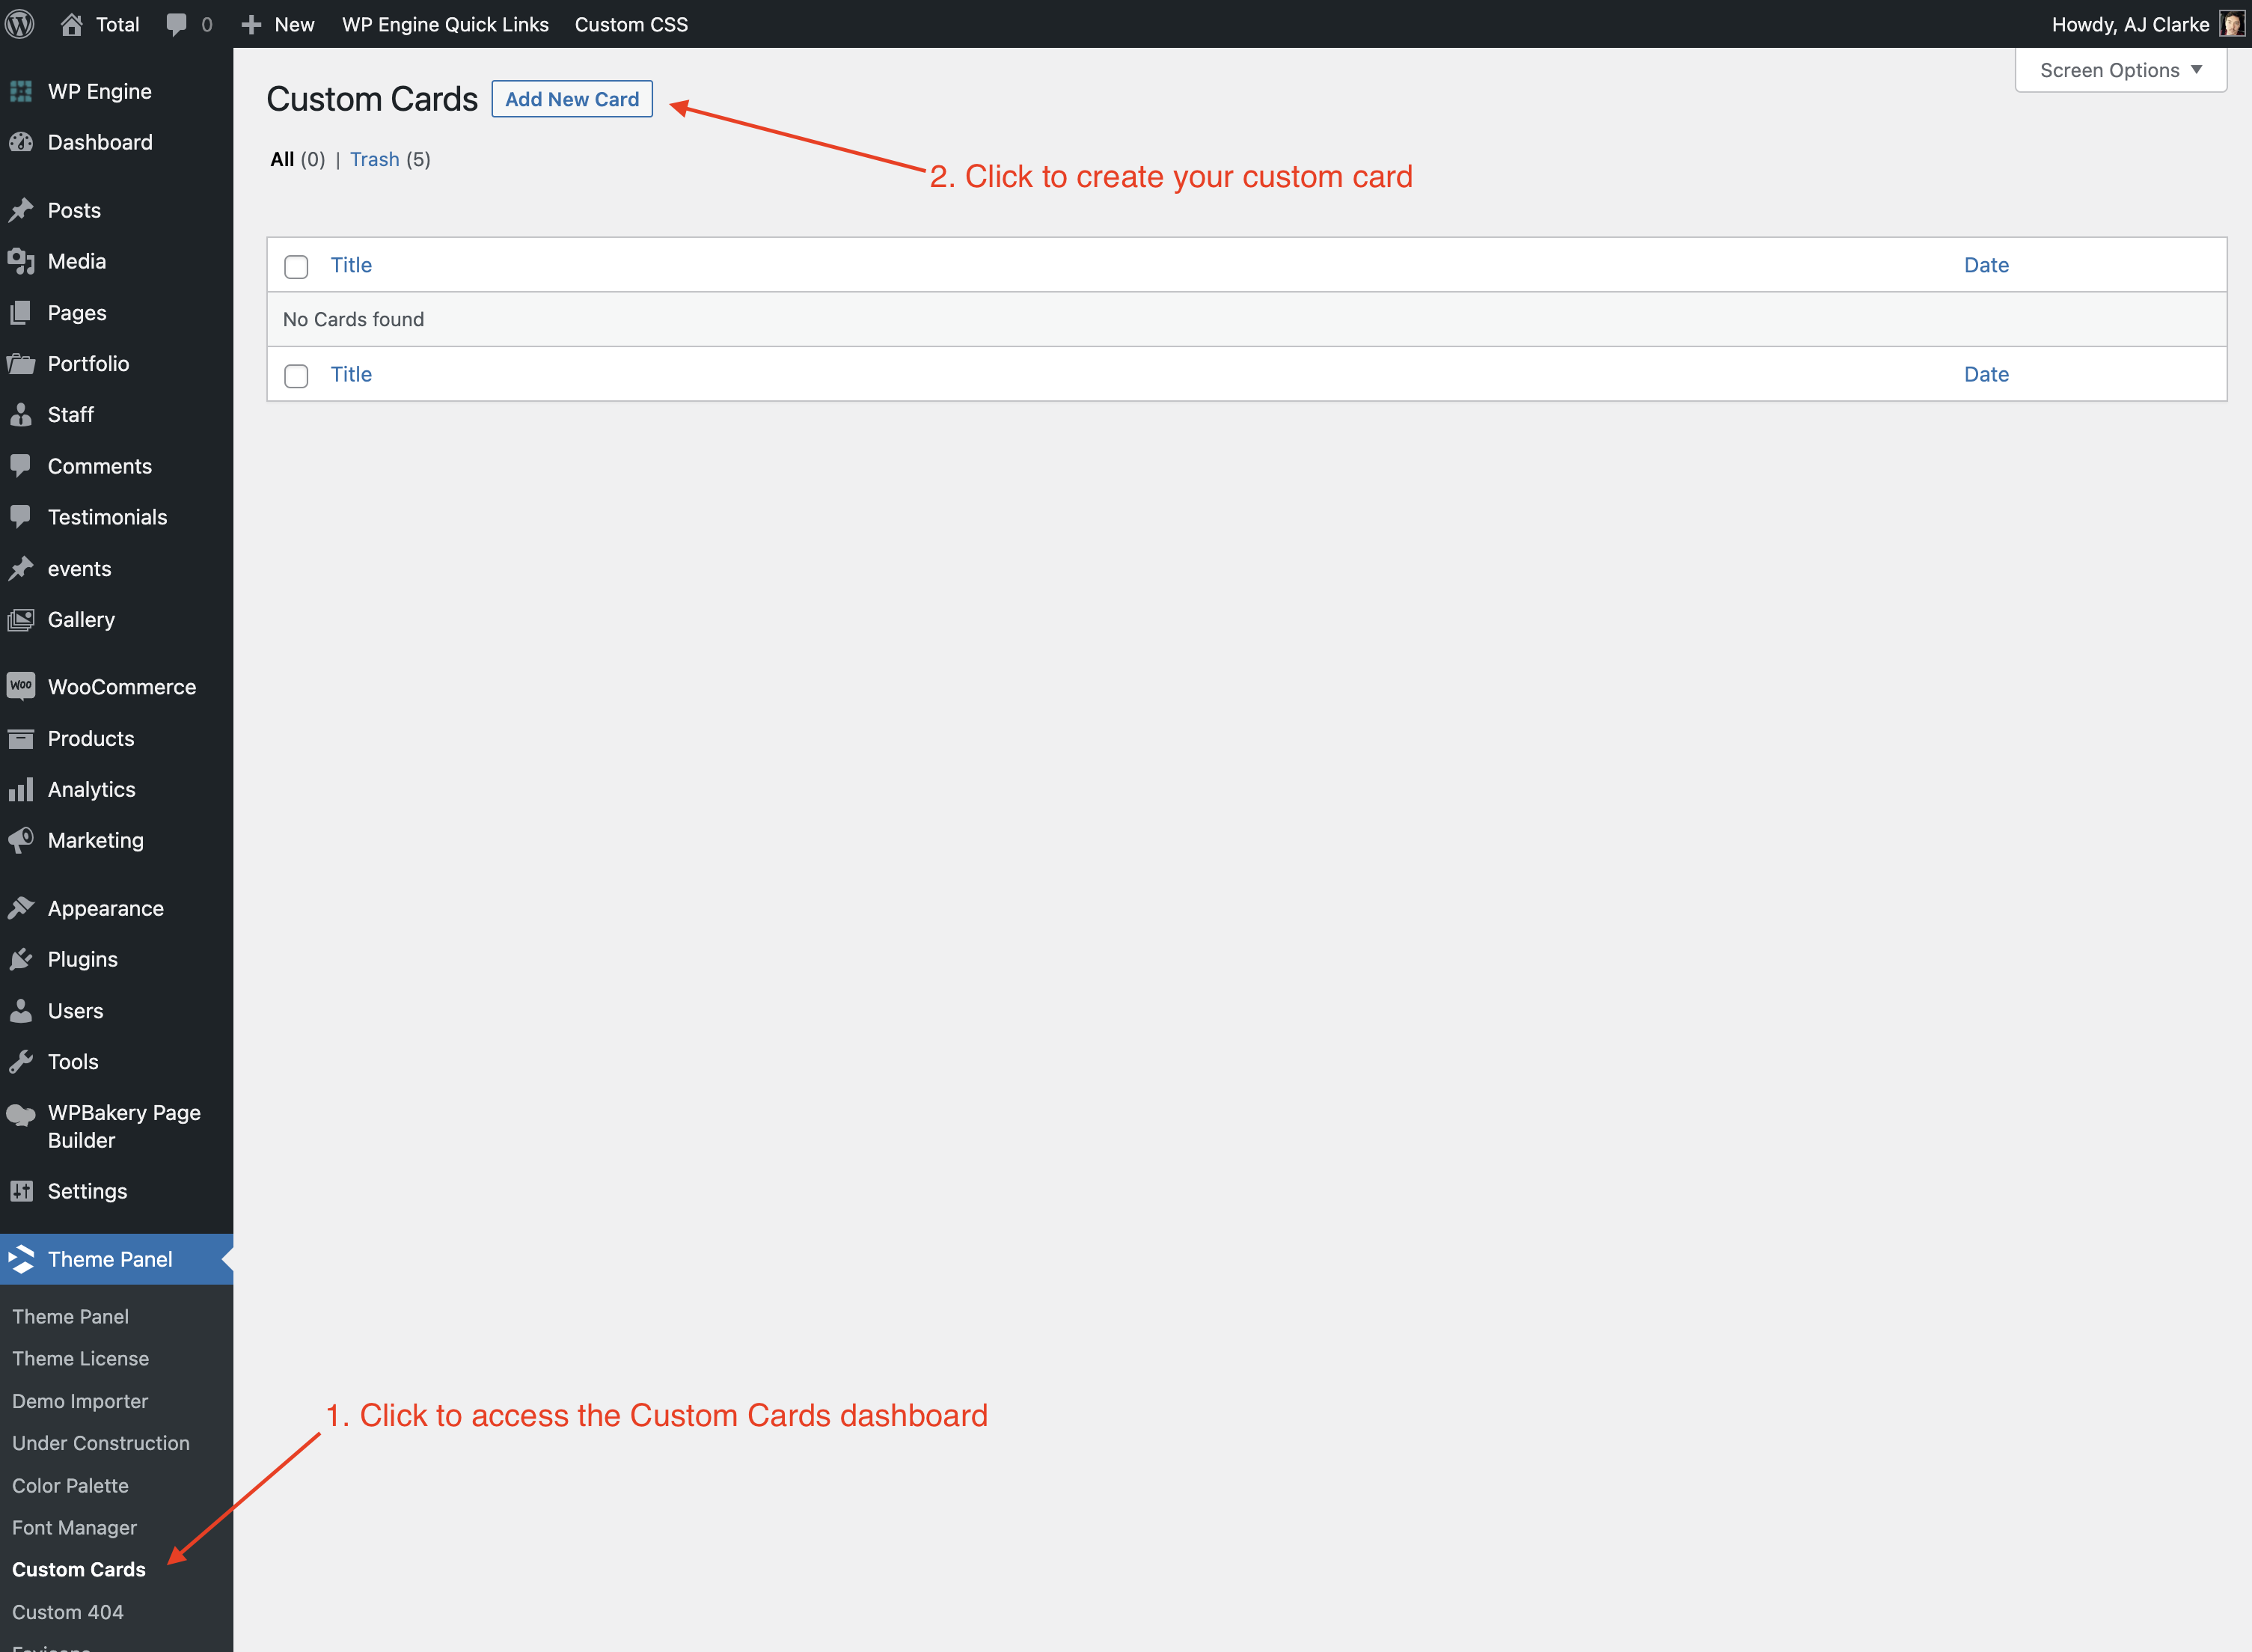
Simply go to Theme Panel > Custom Cards and Click the Add New Card button:
Initial Setup (Before making the Card)
Before you even start making your custom card you will want to setup the basic card options:
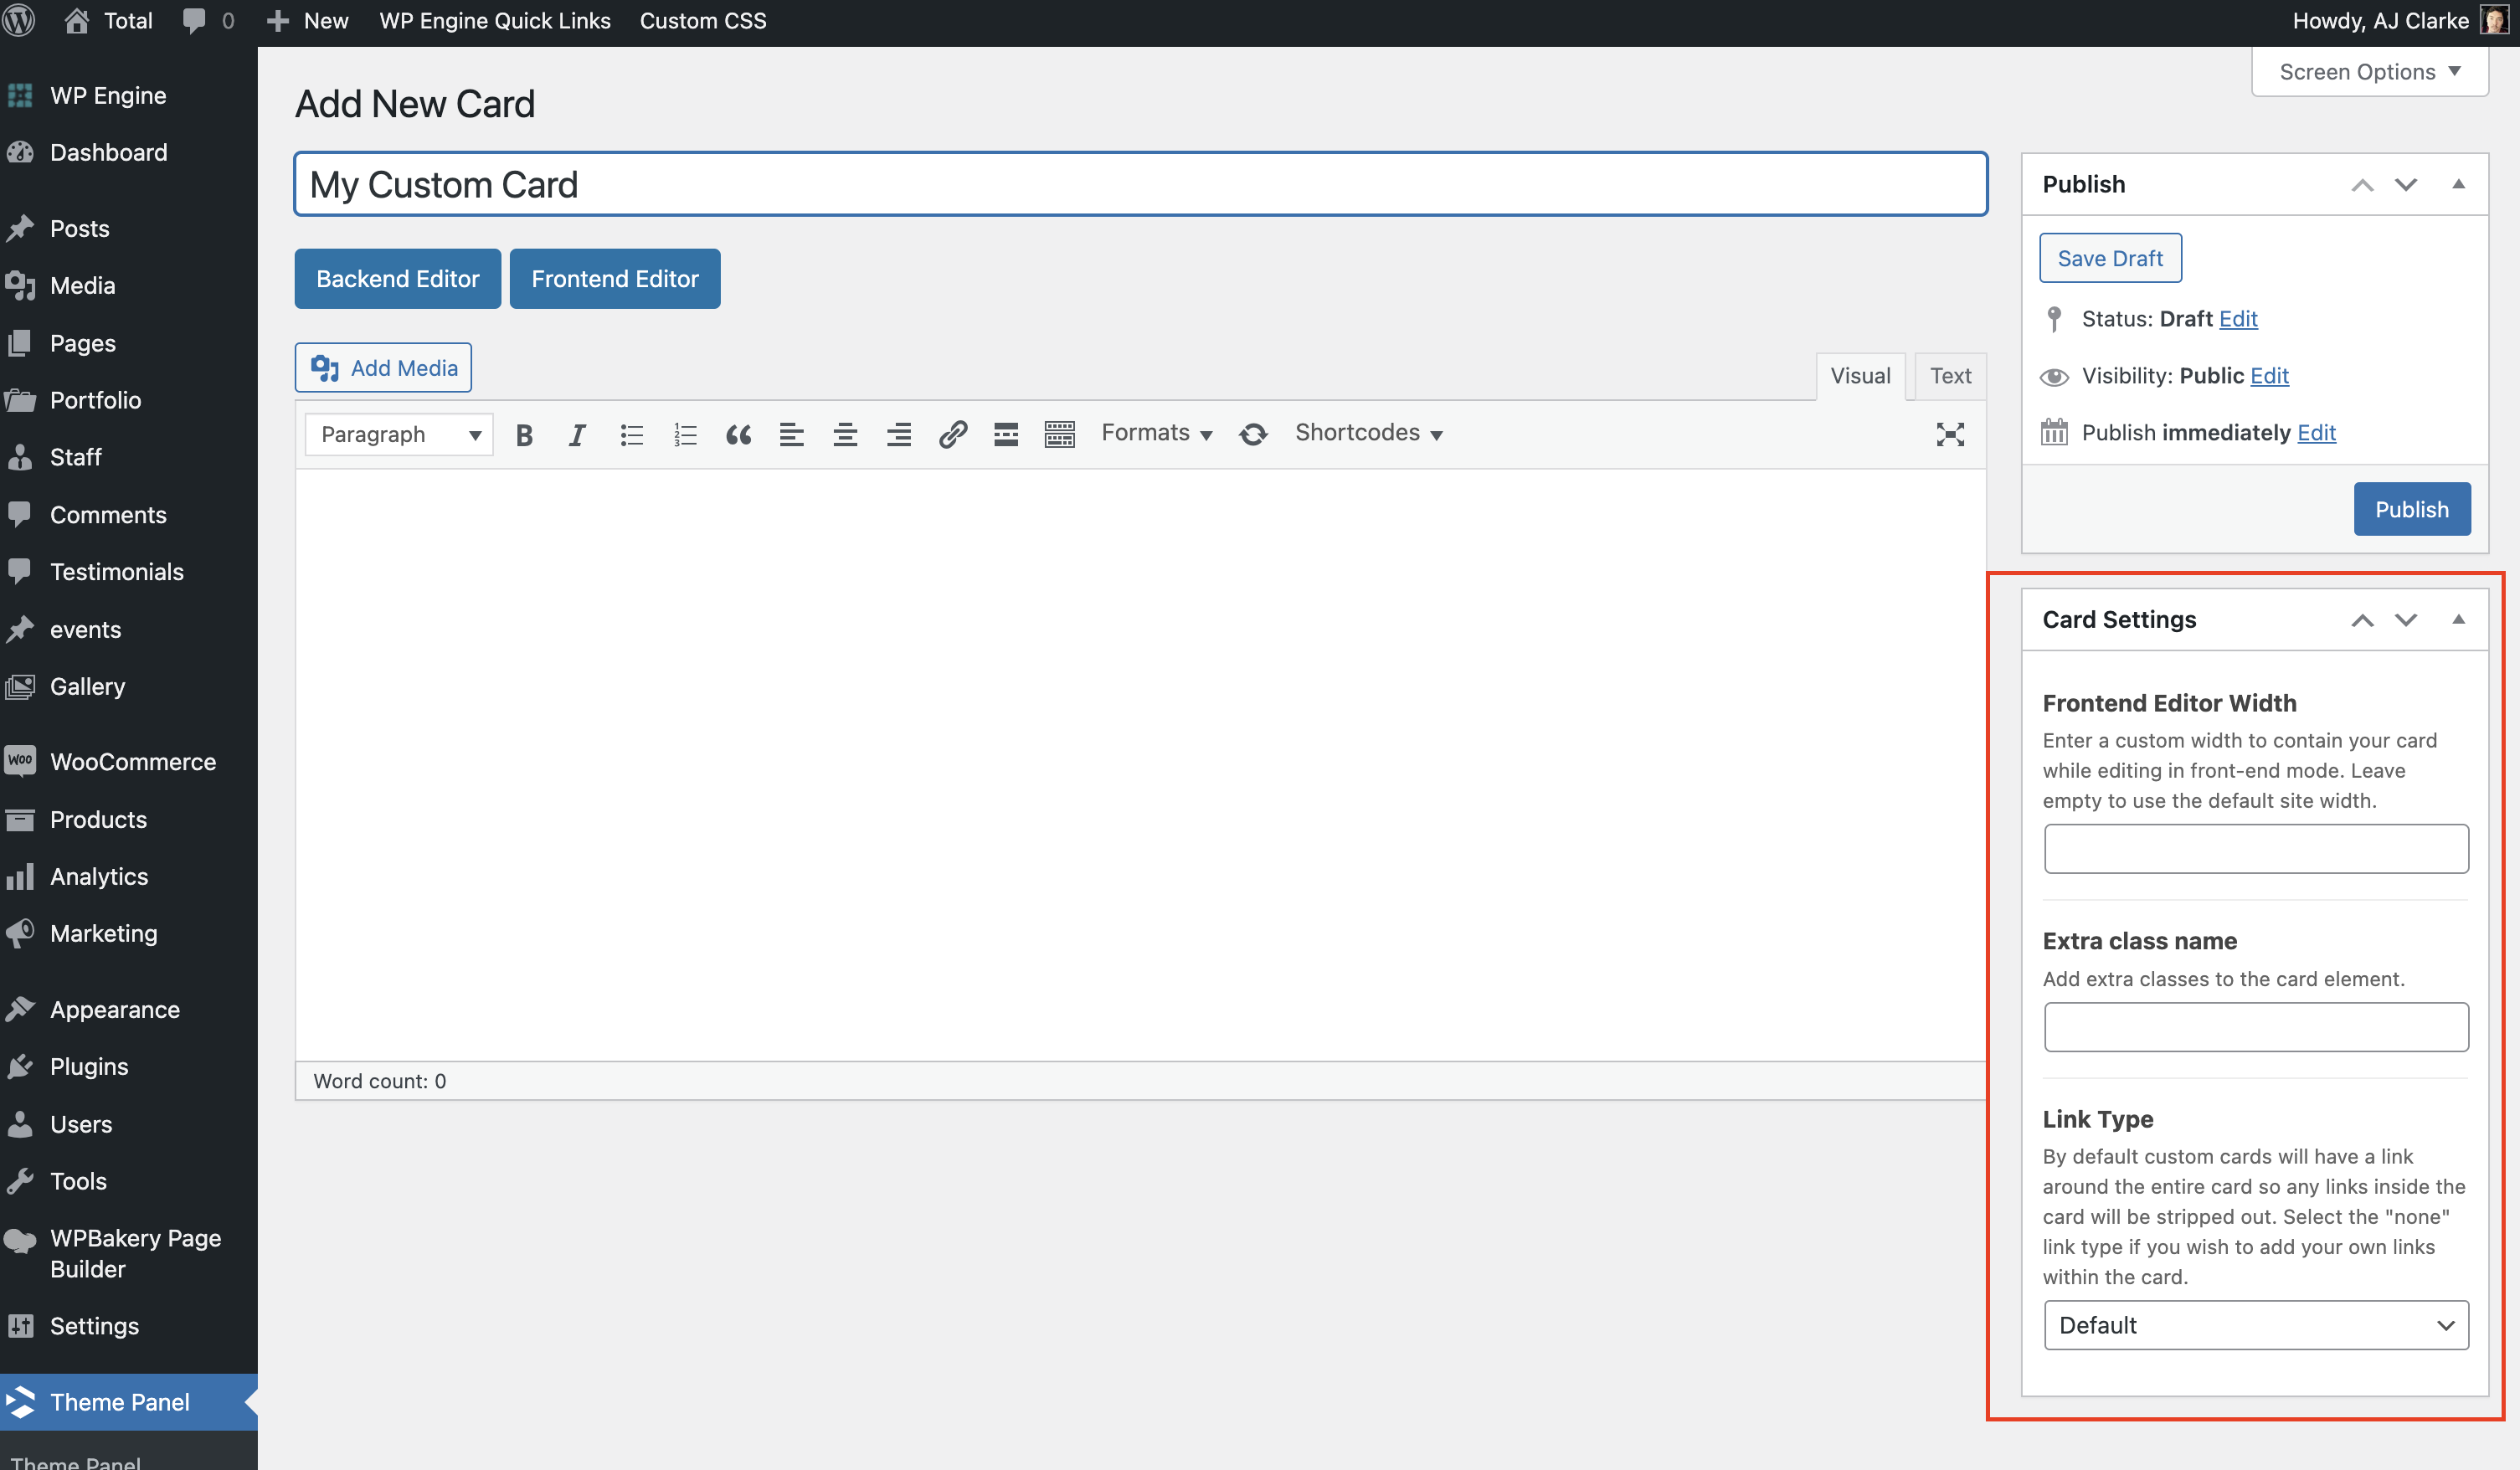
- Frontend Editor Width: By default when you open the front-end editor (WPBakery or Elementor) it will render using the default site width which in many cases is very large. You can use this setting to limit the width so you can get a more accurate visual of your card design. If you aren’t sure what to enter here, we would recommend using 400px.
- Extra Class name: This will allow you to enter a custom classname that will be added to the custom card if you want to target it with CSS.
- Link Type: By default your custom card will have a link around the whole card and it will link to the post. If you rather link the whole card to either lightbox or a modal window you will want to change the Link Type to one of those options or if you rather insert a button with the link to the post or only have the link on an image or title (aka control what links to the post) be sure to change this option to “None”
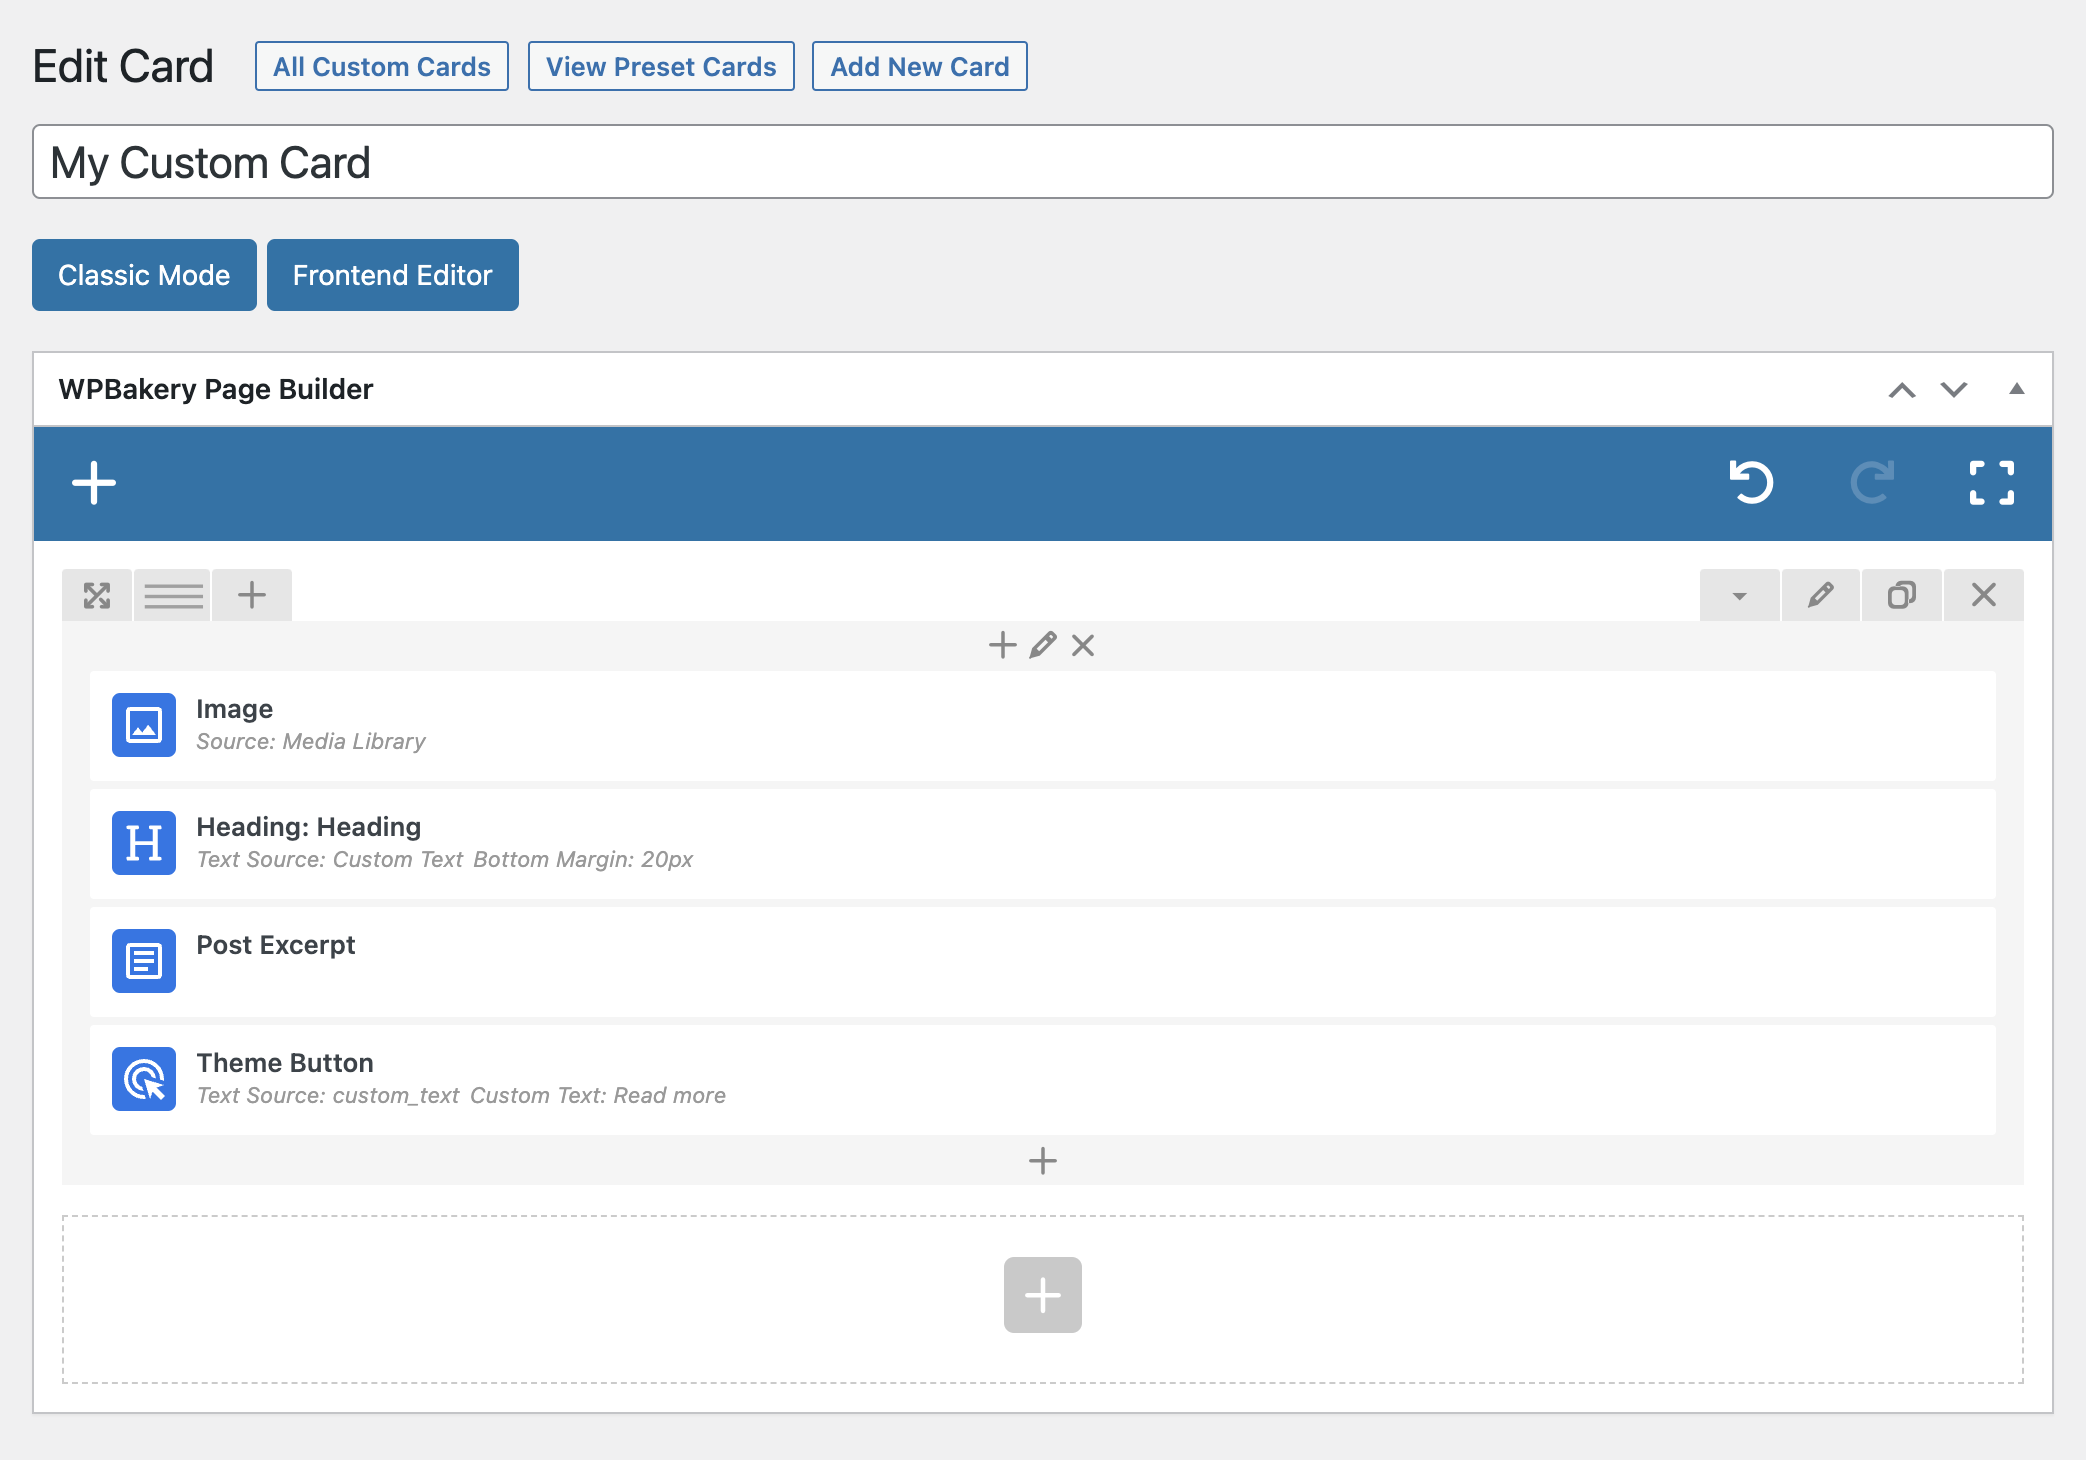
Create Your Card
Now the fun part! Simply drag and drop items to create your custom card so go a head and add some elements!
Overlay Style Cards using WPBakery
Creating custom cards that display your featured image in the background is very easy to do with the WPBakery Page Builder. All you need to do is set your row to display the featured image. Example:
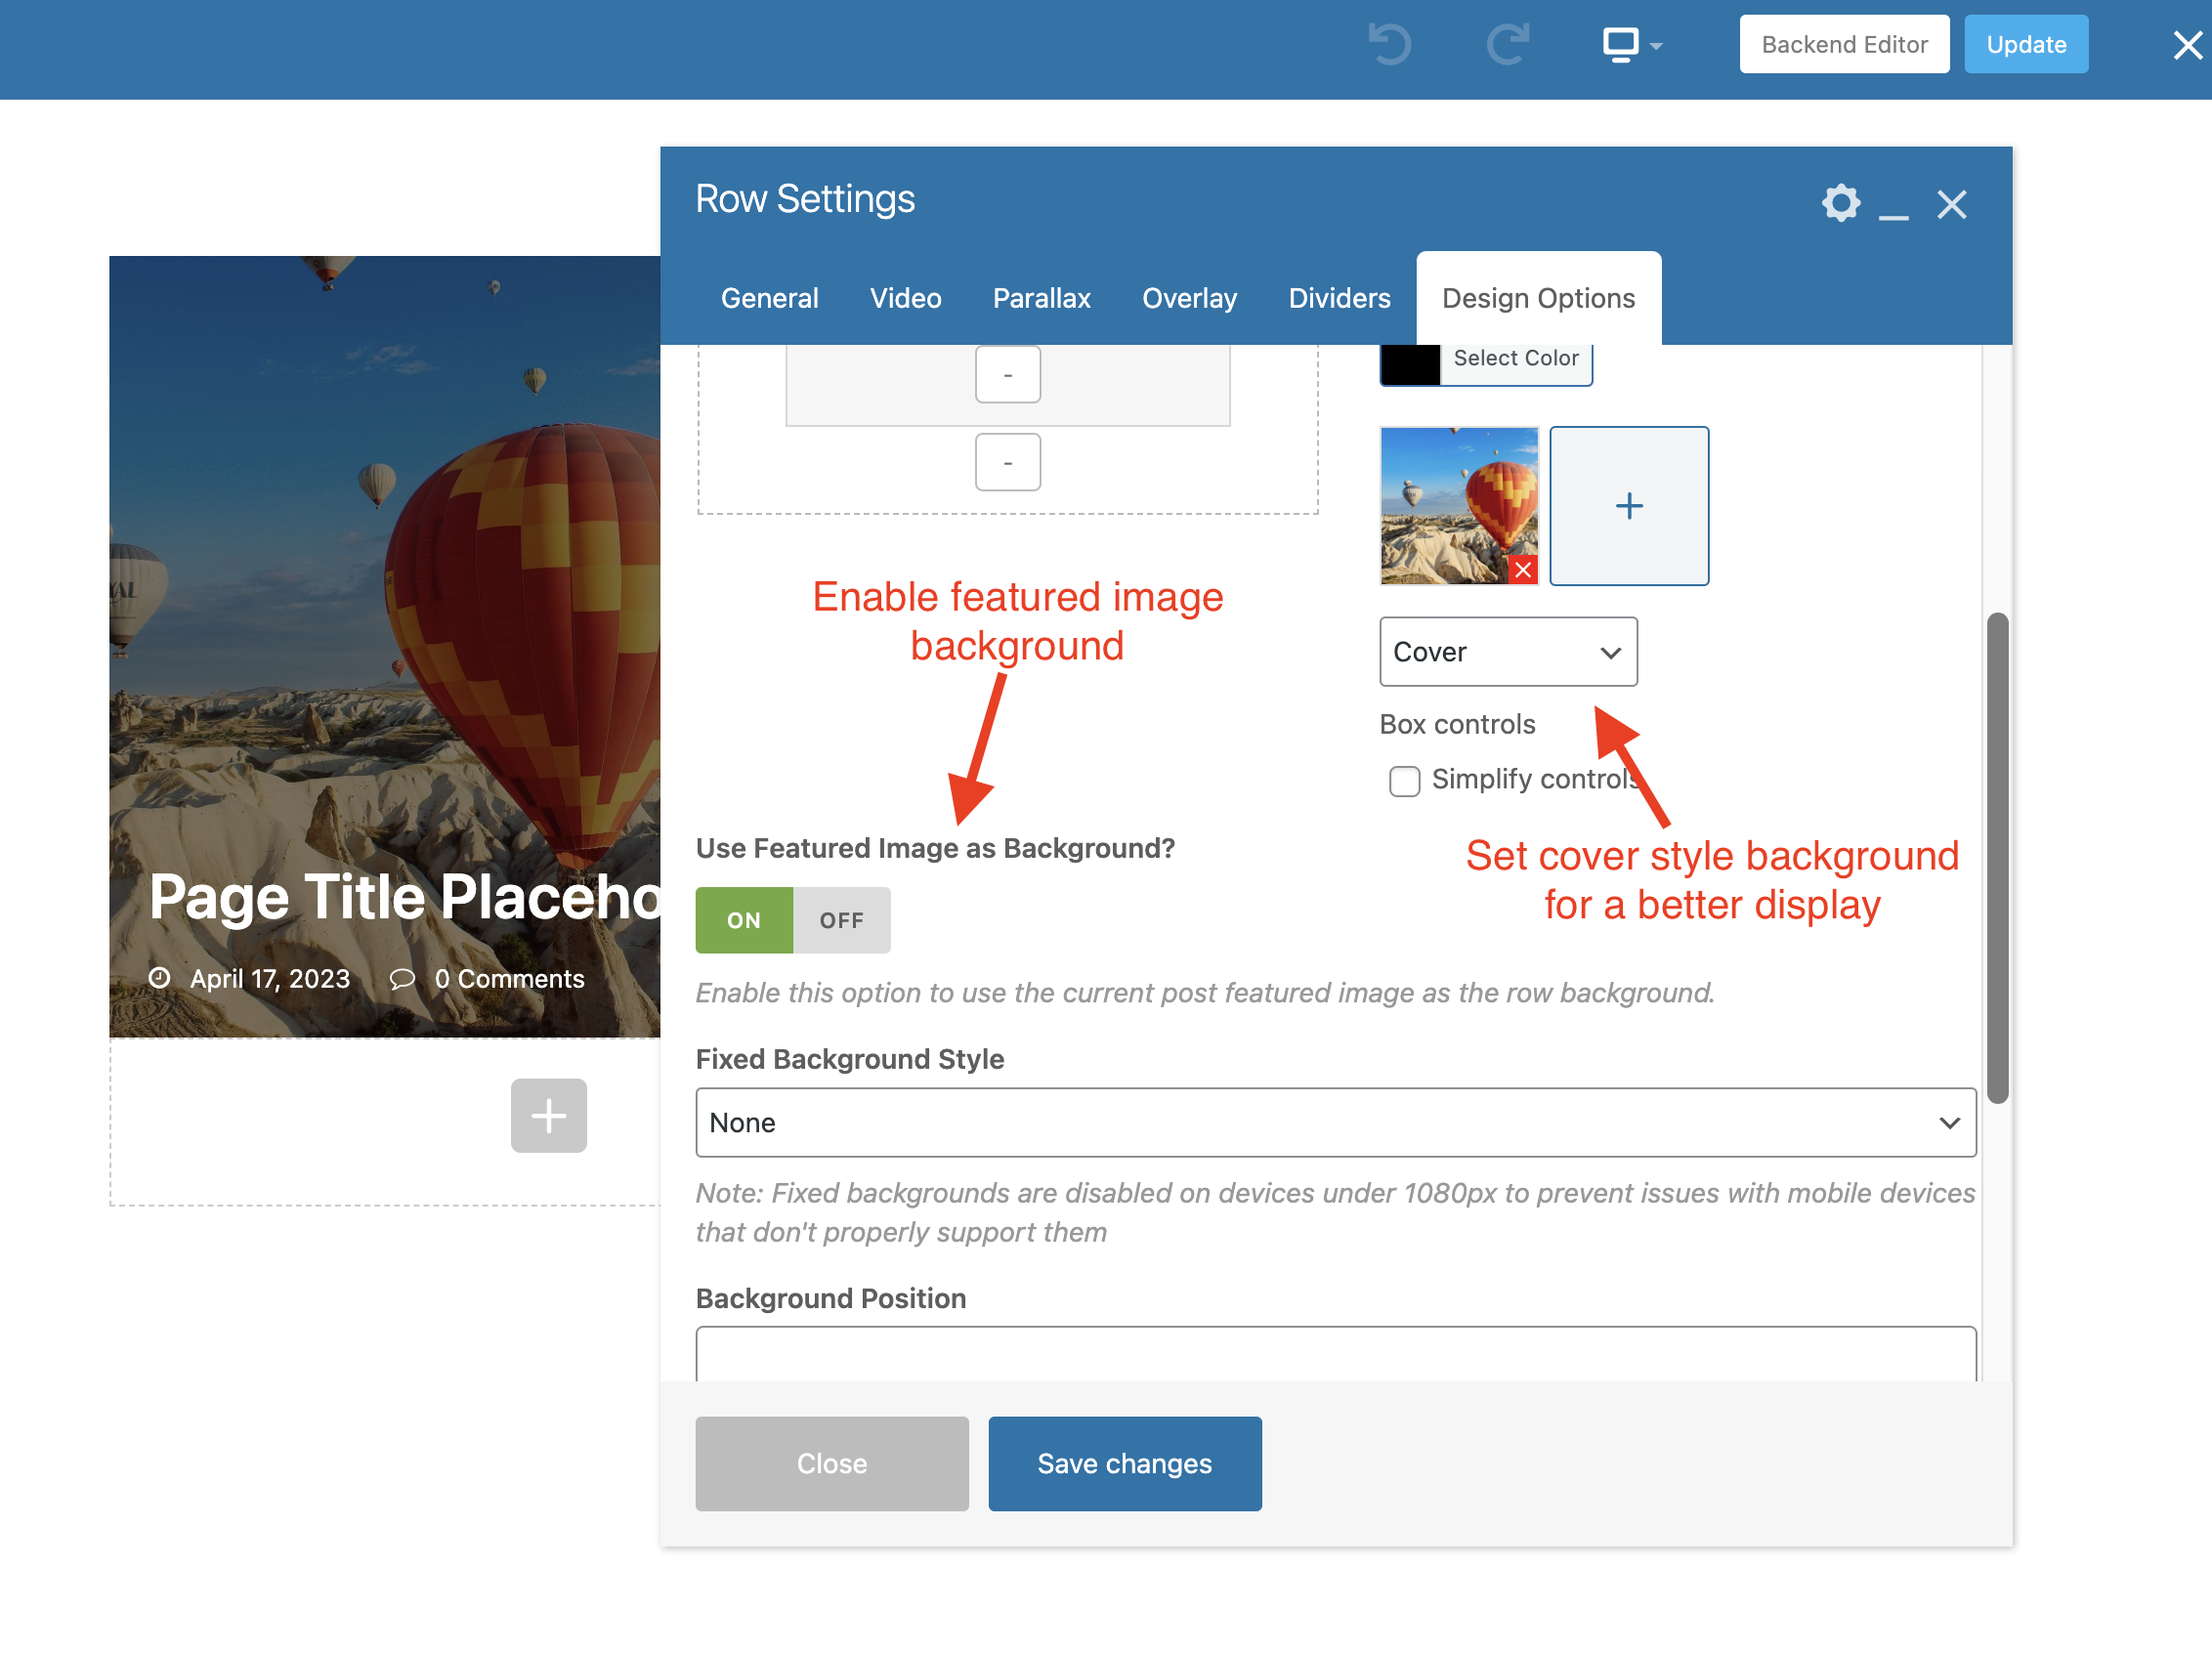
When creating Overlay Style cards we recommend the following:
- Make sure to set the background style to “Cover” in the CSS tab.
- Under the General tab for your row make sure to set the “Inner Column Gap” to “0px” to prevent overflow.
- Under the General tab for your row set the “Content position” to either “Middle” or “Bottom” to better position your content.
- Under the General tab for your row enable the “Equal Height” option to ensure your cards are all the same height so they look best.
- Enable an overlay under the “Overlay” tab to insert a see through background behind your content so it’s more readable.
Video Guides
WPBakery: Here is a video guide showing you how to create a basic card as well as a more complex card (background image with text on top) using the WPBakery page builder.
Elementor: This video shows how to create a simple card style using Elementor.
Coming Soon!
Gutenberg: Gutenberg isn’t as powerful and is more limited in what you can do but here is a video showing how to create a basic card design.
Coming Soon!
Creating Custom Cards Using Code via the API
If you are a developer and prefer creating custom cards with code you can as well. Check out the developer docs here.
Removing Default Cards
If you don’t even want to see the default card styles you can add the following code to your child theme’s functions.php file (note: this will only work in Total 5.5.3+):
add_filter( 'wpex_has_default_card_styles', '__return_false' );