The Total theme has 2 primary methods for adding a button to your site header which are explained below.
Method 1: Inserting a Button Directly into the Menu
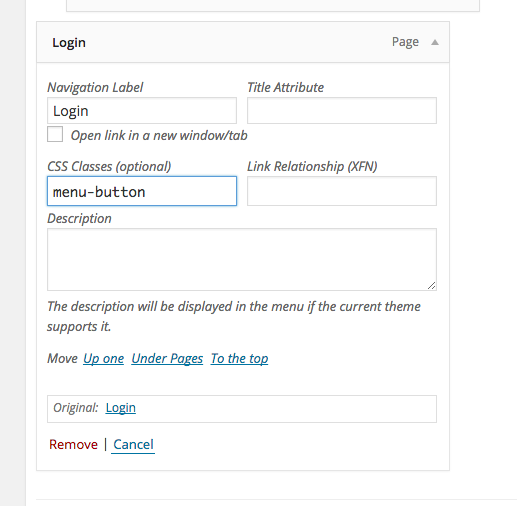
To insert a button directly into the menu all you need to do is add a new menu item and then give it the classname “menu-button” (you can also add the classname “menu-button-rounded” if you want a pill-shape button but your default buttons aren’t pill shaped).
Result
Once you’ve added the classnames to your menu item it should display as a button on the front end like such:

Menu Button Styling
The menu button will take on the default theme accent/button colors which can be adjusted under Appearance > Customize > Global Styles but if you want to customize the button colors it’s very easy using a little custom CSS. Example:
.menu-button {
    --wpex-btn-bg: red;
    --wpex-btn-color: white;
}
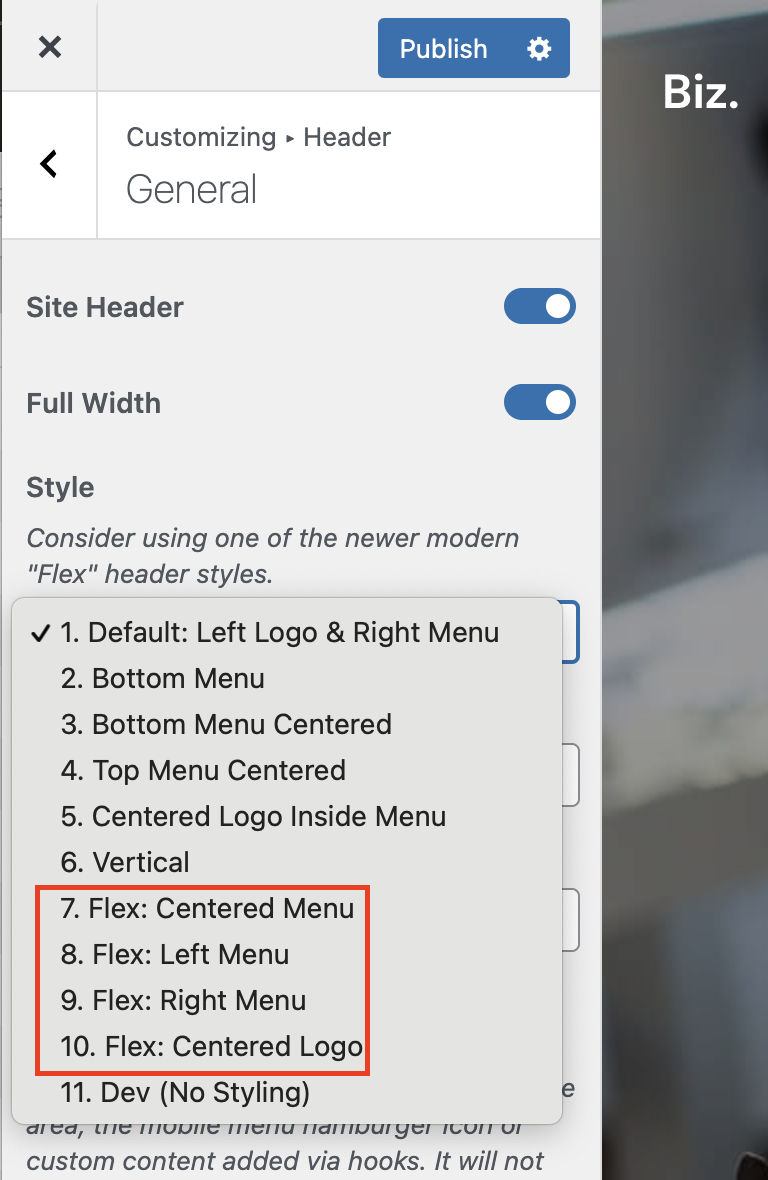
Method 2: Inserting a Button using Flex Header Styles
If you are using one of the new Flex Header styles you can easily add a header button like the Biz demo via the “Side Content” content box in the customizer at Appearance > Customize > Header > General. Please see the example below: